
How to set up paid TTS donations on Twitch.
October 30, 2026
TTS.fish is our product; this guide uses it.
Viewers love hearing their message read out on stream, and plenty of them will pay for it. Getting paid for that on Twitch takes a tool that does three things: takes the viewer’s payment, turns the message into speech, and plays it into your broadcast. This guide sets it up with TTS.fish, where every message is paid and the money goes to your Stripe account.
Bits, Channel Points, or paid TTS?
- Bits are bought from Twitch and pay you through Twitch. Alert tools such as Streamlabs and Sound Alerts can read cheers aloud.
- Channel Pointscost viewers nothing, so TTS on Channel Points is fun but doesn’t pay you.
- Paid TTS through a linkpays you directly through Stripe, at prices you set per message, and works the same if you also stream on Kick or YouTube. That’s what the rest of this guide sets up.
How paid TTS works
- You get a public link, tts.fish/your_name, and a QR code.
- A viewer opens it, types a message, picks a voice, and pays with Stripe. They don’t need an account.
- The message lands in your queue, waits for your approval unless you turn on auto-approve, and plays on stream. The viewer’s card is only charged when it plays.
- The 7% + 30¢ platform fee and Stripe processing fees are deducted from the payment.
Step 1: Set up your account
- Sign up with your Twitch name as your username so your link matches your channel.
- Confirm your email, then connect Stripe. You don’t need a Stripe account first. Onboarding usually takes a few minutes; have your ID and bank details ready.
Step 2: Price it
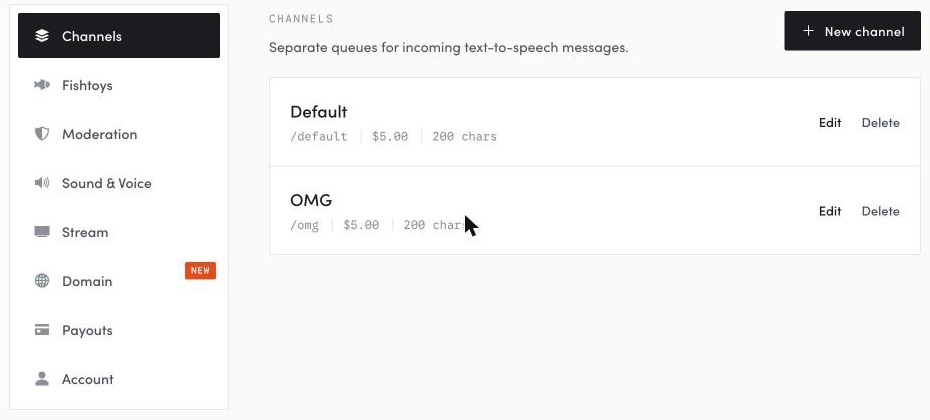
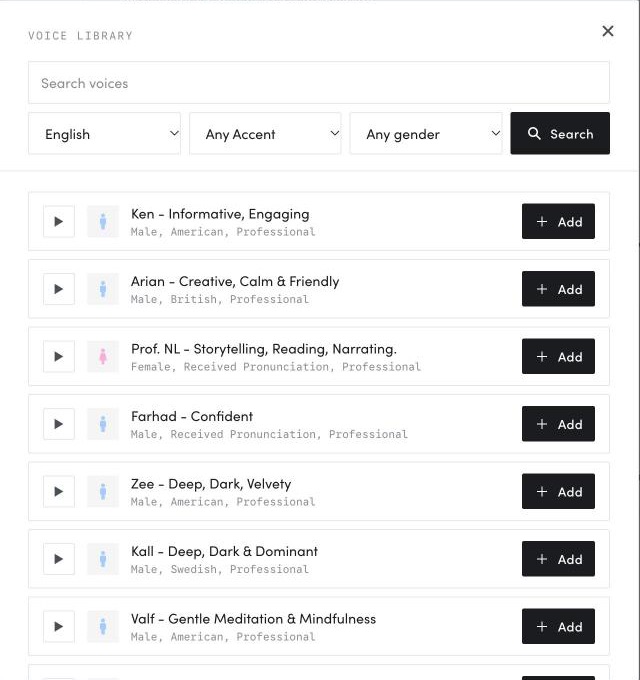
Set a base price per message (from $1) and a maximum length. Price tiers let longer messages cost more. If some voices are more popular or more likely to be abused, put them on a separate channel with a higher price and untick them on your main channel, so viewers can only pick them at the higher price. Voices come from ElevenLabs: use the built-in set, add voices from the ElevenLabs library, or clone your own.
Step 3: Get it into your stream
Open your tts.fish page while logged in and click Start Listening, or use the desktop app. Viewers can only send messages while you’re listening. Capture the audio in OBS or Streamlabs, and add the overlay URL as a browser source to show played messages and your QR code on screen. The OBS guide has the details.
Step 4: Promote it on Twitch
- Add a panel under your stream that links to your tts.fish page.
- Have your chat bot reply to a command like !tts with your link.
- Keep the QR code on screen for viewers watching on a computer or TV.
- Read the first few messages with some energy. It sells the rest.
- Streaming on Kick too? The same link works there; see the Kick guide.
Step 5: Protect the stream
Twitch holds you responsible for what plays on your stream; its guidelines FAQ tells streamers to mute unmoderated TTS when they step away. Before you go live, add blocked words under Settings > Moderation and decide whether to keep approving messages yourself. Rejected and skipped messages aren’t charged. Our guide on stopping TTS trolls covers the full setup.
What it costs
- No monthly fee, just 7% + 30¢ per paid message, with Stripe processing fees charged separately. Prices are in US dollars.
- Payout timing depends on your Stripe account’s schedule and any holds or verification requirements. Check Stripe for required actions.
- If a viewer charges back, the full message amount (our fee isn’t refunded) and Stripe’s dispute fee come out of your balance.